Wednesday, December 15, 2010
Digital Painting
1. Open Photoshop
2. Open a new blank document by going to the File menu and selecting New.
3. Set the Width at 8.5 and the Height at 11 inches, Set the Resolution to 300 dpi,
Color Mode should be RGB 8 bit, Choose White for the Color
4. Fill the blank document by going to the Edit menu and selecting Fill,
Choose Color under the drop down menu options. Pick your color from the options (Yellow).
5. Make sure the Layers Palette is visible, if not go to Window - > Layers
6. Create a new empty layer by clicking on the small square next to the cookie.
7. Choose the Eliptical Marquee from the Tools Palette and set the Feather to 25 pixels.
8. Draw out an oval on the new empty layer
9. Fill the Oval with Blue.
10. Create a new empty layer by clicking on the small square next to the cookie.
11. Choose the Brush Tool (Keyboard Letter B)
12. Set the default colors for foreground and background by clicking on the black & white squares in the tool palette.
13. On the new empty layer paint your black marks with the brush (lines and circles).
Adjust your brush with the brackets or in the drop down menu. (Left bracket makes the brush smaller, right bigger)
14. Use the pencil tool for thinner lines. (It is located under the brush in the tools palette)
15. Choose the color red for the foreground color. Using the brush tool with a soft edge, paint the red dot. (You can bring the hardness slider down to the left to make the soft edge).
16. Choose the color black for the foreground color. Using the brush tool with 60% opacity and a soft edge, paint the last black dot.
Wednesday, December 8, 2010
Tuesday, December 7, 2010
Gradient Tool
1. Open Photoshop
2. Open a new blank document by going to the File menu and selecting New.
3. Set the Width at 8.5 and the Height at 11 inches, Set the Resolution to 300 dpi,
Color Mode should be RGB 8 bit, Choose White for the Color
4. Make sure the Layers Palette is visible, if not go to Window - > Layers
5. Choose the Marquee (Keyboard shortcut is M) from the Tools Palette and set the Feather to 25 pixels.
6. Choose your foreground color by clicking on the top colored square at the bottom of the tool palette. Choose a shade of blue. We will leave the background color as black for now. (If it is not already black, set it to black)
7. Draw out a square Marquee Tool.
8. Click on the Gradient Tool (Keyboard shortcut is G)
9. Choose the Type of Gradient in the drop down menu (we will use the first one)
10. Inside the Marquee Tool, click and drag out your Gradient Tool. You will see the longer you stretch the Gradient Tool, the more of the foreground color is visible. The shorter you draw out the Gradient Tool, the more of the background color is visible.
11. Repeat this process (steps 5-10) with different Marquee tools and different colors. Try again with a different Gradient.
Advanced:
You may continue to add more layers of varying colors or play with erasing parts of the layers until you are happy.
Try flipping the canvas as you create the work to see how it varies. (Image menu - Rotate Canvas - 180 degrees)
You can also add additional Hue/Saturation layers to see how they change the image.
Save the image:
Save your image by going to the File menu and Save As (Choose JPEG for finished images and PSD for unfinished images). For JPEG save the image at the highest size (Size 12).
***REMEMBER YOU CAN ALWAYS GO BACKWARDS ONE STEP WITH THE KEYBOARD SHORCUT CONTROL + Z or COMMAND + Z***
*If you finish with extra time you can try it with one of your own images.
Wednesday, December 1, 2010
Homework for December 8
make work inspired by that photographer!
http://universitysettlementphoto.blogspot.com/2010/10/contemporary-photographers-working-with.html
Tuesday, November 30, 2010
Instructions for Using Filters
1. Open Photoshop
2. Open your image by going to the File menu and selecting Open.
3. Choose File and click Open
4. Make sure the Layers Palette is visible, if not go to Window - > Layers
5. Copy your background using the keyboard shortcut CNTRL + J (Command J)
6. Go to the Filter Menu and choose Filter Gallery
7. In the Filter Gallery at the bottom left corner choose Fit On Screen (It will allow you to see the whole image)
8. Try the various options under the Artistic List, when you like your choice click OKAY
Save the image:
Save your image by going to the File menu and Save As (Choose JPEG for finished images and PSD for unfinished images). For JPEG save the image at the highest size (Size 12).
***REMEMBER YOU CAN ALWAYS GO BACKWARDS ONE STEP WITH THE KEYBOARD SHORCUT CONTROL + Z or COMMAND + Z***
Advanced:
Use the Selection Tools to Change the color of particular areas in the image:
1. Under the Image menu choose Mode and RGB. If you are asked if you want to flatten the image, say no.
2. Select your foreground color by clicking on the top square in the Tools Palette, Select your color from the options provided
3. Use the marquee tools to draw out geometric shapes and then fill them with color using the paint bucket.
4. You can also make a second copy of the background and apply a different filter to it. Then you can erase parts of the top layer to reveal what is below.
Save your image by going to the File menu and Save As (Choose JPEG for finished images and PSD for unfinished images). For JPEG save the image at the highest size (Size 12).
***REMEMBER YOU CAN ALWAYS GO BACKWARDS ONE STEP WITH THE KEYBOARD SHORCUT CONTROL + Z or COMMAND + Z***
Tuesday, November 23, 2010
make your own colorfield painting
1. Open Photoshop
2. Open a new blank document by going to the File menu and selecting New.
3. Set the Width at 8.5 and the Height at 11 inches, Set the Resolution to 300 dpi,
Color Mode should be RGB 8 bit, Choose White for the Color
4. Fill the blank document by going to the Edit menu and selecting Fill,
Choose Color under the drop down menu options. Pick your color from the options (Blue).
5. Make sure the Layers Palette is visible, if not go to Window - > Layers
6. Copy your background using the keyboard shortcut CNTRL + J (Command J)
7. Fill the top layer with a different color (Pink), by following step 4 again
8. Choose the Marquee from the Tools Palette and set the Feather to 25 pixels.
9. On the top Layer draw out the Marquee Tool into a skinny rectangle.
10. In the Select menu pick Inverse. Then press delete. You should now see a pink square on a blue background.
11. Click on your Background layer. Click CNTRL + J (Command + J) to copy the background again.
12. With the Background copy layer selected go to the Edit menu and choose Fill. Choose your color (bright green).
13. Also with the Background copy layer selected, choose the Marquee tool and draw out another thin rectangle.
14. In the Select menu pick Inverse. Then press delete. You should now see both a pink square and a green square on a blue background.
15. Click on your Background layer. Click CNTRL + J (Command + J) to copy the background again.
16. With the Background copy layer selected go to the Edit menu and choose Fill. Choose your color (orange).
17. Also with the Background copy layer selected, choose the Marquee tool and draw out another thin rectangle.
18. In the Select menu pick Inverse. Then press delete. You should now see, an orange square, a pink square, and a green square on a blue background.
Advanced:
You may continue to add more layers of varying colors or play with erasing parts of the layers until you are happy.
Try flipping the canvas as you create the work to see how it varies. (Image menu - Rotate Canvas - 180 degrees)
You can also add additional Hue/Saturation layers to see how they change the image.
Save the image:
Save your image by going to the File menu and Save As (Choose JPEG for finished images and PSD for unfinished images). For JPEG save the image at the highest size (Size 12).
***REMEMBER YOU CAN ALWAYS GO BACKWARDS ONE STEP WITH THE KEYBOARD SHORCUT CONTROL + Z or COMMAND + Z***
*If you finish with extra time you can try it with one of your own images.
Tuesday, November 9, 2010
Making abstractions using hue & saturation
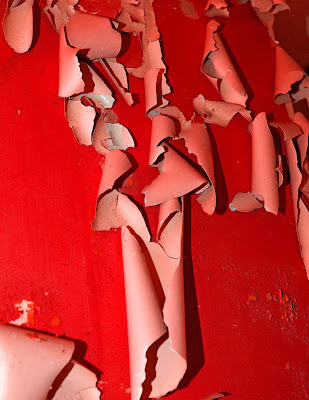
1. Open Photoshop
2. Open your image by going to the File menu and selecting Open.
3. Choose File and click Open
4. Make sure the Layers Palette is visible, if not go to Window - > Layers
5. Copy your background using the keyboard shortcut CNTRL + J (Command J)
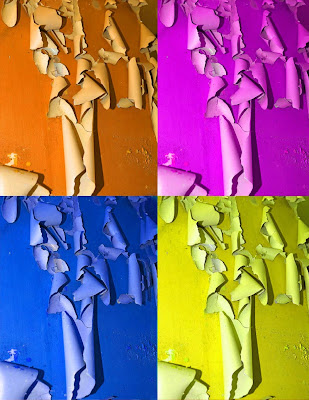
6. Click on the Cookie (Create new fill or adjustment layer), choose "hue/saturation"
7. Make the top layer orange by sliding the hue slider to the right (about + 30)
8. Use the Keyboard shortcut CNTRL + E (Command E) to Merge Down.
Advanced:
Use Free Transform to make the top layer smaller:
1. With the top layer selected, hit (CNTRL + T or Command T) to Free Transform the top layer.
2. When you see the corner boxes on the layer, click on the bottom right corner of the top layer, at the same time hold down the SHIFT key and drag the corner up until the image is a little smaller than 1/4 of the page. (Holding the SHIFT key while dragging will maintain the aspect ratio.)
3. Hit the ENTER/RETURN key on your keyboard to apply the transformation.
4. Right Click (CNTRL + Click) on the top layer and choose duplicate layer.
5. Use the Move Tool (V on the keyboard) to move the top layer over.
Change the color of the top layer:
1. Click on the Cookie (Create new fill or adjustment layer), choose "hue/saturation"
2. Make the top layer purple by dragging the hue slider to the left (about - 90). It will look like the entire image is changing, but after you merge down it will only affect the top layer.
3. Use the Keyboard shortcut CNTRL + E (Command E) to Merge Down.
4. Right Click (CNTRL + Click) on the top layer and choose duplicate layer.
5. Use the Move Tool (V on the keyboard) to move the top layer down.
Change the color of the top layer again:
1. Click on the Cookie (Create new fill or adjustment layer), choose "hue/saturation"
2. Make the top layer yellow by dragging the hue slider to the right (about + 120). It will look like the entire image is changing, but after you merge down it will only affect the top layer.
3. Use the Keyboard shortcut CNTRL + E (Command E) to Merge Down.
4. Right Click (CNTRL + Click) on the top layer and choose duplicate layer.
5. Use the Move Tool (V on the keyboard) to move the top layer over.
Change the color of the top layer again (last time!):
1. Click on the Cookie (Create new fill or adjustment layer), choose "hue/saturation"
2. Make the top layer blue by dragging the hue slider to the right (about + 160). It will look like the entire image is changing, but after you merge down it will only affect the top layer.
3. Use the Keyboard shortcut CNTRL + E (Command E) to Merge Down.
WHAT DO YOU HAVE??? (think about our conversation last week)
Save the image:
Save your image by going to the File menu and Save As (Choose JPEG for finished images and PSD for unfinished images). For JPEG save the image at the highest size (Size 12).
***REMEMBER YOU CAN ALWAYS GO BACKWARDS ONE STEP WITH THE KEYBOARD SHORCUT CONTROL + Z or COMMAND + Z***
*If you finish with extra time you can try it with another image of your own or you can do it again, but only change the hue of selected areas using your selection tools.
color theory links
Chroma: How pure a hue is in relation to gray
Saturation: The degree of purity of a hue.
Intensity: The brightness or dullness of a hue. One may lower the intensity by adding white or black.
Luminance / Value: A measure of the amount of light reflected from a hue. Those hues with a high content of white have a higher luminance or value.
Shade and tint are terms that refer to a variation of a hue.
Shade: A hue produced by the addition of black.
Tint: A hue produced by the addition of white.
Tuesday, November 2, 2010
digital photograms using the invert tool
1. Open Photoshop
2. Open your image by going to the File menu and selecting Open.
3. Choose File and click Open
4. Make sure the Layers Palette is visible, if not go to Window - > Layers
5. Copy your background using the keyboard shortcut CNTRL + J (Command J)
6. Click on the Cookie (Create new fill or adjustment layer), choose "invert"
7. Use the Keyboard shortcut CNTRL + E (Command E) to Merge Down.
for advanced students:
1. With the top layer selected, use Free Transform (CNTRL + T or Command T) to make the top layer smaller.
2. While in Free Transform mode, grab the corner of the top layer, at the same time hold down the SHIFT key and drag the corner down until the image is a little smaller than 1/4 of the page
3. Right Click (CNTRL + Click) on the top layer and choose duplicate layer.
4. Duplicate the layer again and again until you have 4 of the small images.
5. Click on the background layer, Click on the Create New Layer button from the bottom of the layers palette.
6. Click on the new empty layer and fill it with black by going to Edit - > Fill, Choose Black from the drop down menu and 100% for blending
7. Click on the lowest layer of the 4 small images.
8. Go to the Cookie & choose Black & White.
9. Merge down the Black & White layer.
10. Drag the Black & White flower layer to the top of the layers palette.
11. Click on the lowest layer of the 4 small images.
12. Go to the Cookie & choose Black & White.
13. Merge Down the Black & White Layer. Then go to the Cookie again and Invert that layer.
14. Merge Down the Invert Layer.
15. Drag that layer to the top of the layers palette.
16. Click on the lowest layer of the 4 small images.
17. Go to the Cookie & choose Invert. Merge Down the layer.
18. Use Free Transform to flip the images and change the orientation.
19. Go to the Cookie and choose posterize. Adjust the slider to make the image more abstract.
Save the image:
Save your image by going to the File menu and Save As (Choose JPEG for finished images and PSD for unfinished images). For JPEG save the image at the highest size (Size 12).
***REMEMBER YOU CAN ALWAYS GO BACKWARDS ONE STEP WITH THE KEYBOARD SHORCUT CONTROL + Z or COMMAND + Z***


