Sunday, May 1, 2011

landscape photographers


landscape photographers

guy tillim (starts around 5 minutes)


robert adams


edward burtynsky


William A. Garnett


chris jordan


edward weston


bernd  & hilla becher


myoung ho lee


asako narahashi


sze tsung leon


hiroshi sugimoto


joe deal


michael kenna


richard misrach


ansel adams


kim hoeckele


Tips from National Geographic:


Related Projects:

Manahatta


Related Historical Resources:


Syllabus: Landscape


Digital Photography: Landscape

    This 8-week course will explore landscape photography with an emphasis on the city environment and cityscape. Students will be encouraged photograph on their own outside of class in addition to the pictures they will take during class time. 
    Slide presentations of notable landscape photographers will be used for reference and inspiration. Some historical and contemporary photographers that will be discussed include Sze Tsung Leon, Ansel Adams, Hiroshi Sugimoto, Michael Kenna, Henry Wessel, Jeff Brouws, and Chip Hooper. Optional museum and gallery visits will also be recommended to further inspire students.
    Students will photograph using digital cameras and will learn digital editing using Photoshop.  Students should be comfortable using computers and the Internet. Class is open to all levels of photography experience.

Week 1: Introduction to the Class 
.Class materials and expectations
.Overview of topics to be covered in the entire workshop
.Photography basics: the medium of photography & the camera
.Flash Options, Aperture, Shutter Speed, and ISO

Week 2: Themes in Landscape Photography
.Review of last week's topics
.Slideshow on historical and contemporary landscape photography
.Computer Basics: creating folders, labeling & moving items
.Downloading Instructions
.Viewing photos on the computer
.Camera Technique: Wide Angle vs. Telephoto

Week 3: Digital Editing
.Review of last week's topics
.Downloading
.Viewing & Selecting Photos
.Basics of Photoshop: menus, tools, layers, saving images 

Week 4:
.Review of last week's topics
.Downloading
.Viewing & Selecting Photos
.Photoshop: lighting and color adjustments

Week 5:
.Review of last week's topics
.Downloading & Editing
.Photoshop: contrast, brightness, hue, saturation

Week 6:
.Review of last week's topics
.Photoshop: making selections

Week 7:
.Review of last week's topics
.Photoshop: Sizing images for print, email, or web

Week 8: Final Critique
.view students finished images
.group critique
.review of all topics covered 

Tuesday, April 26, 2011

extra credit


images for final exam!

1. Use the clone stamp and patch tool to cover over the people in the background.


2. Use the selection tools, levels, hue and saturation to eliminate the stripe (as much as you can).

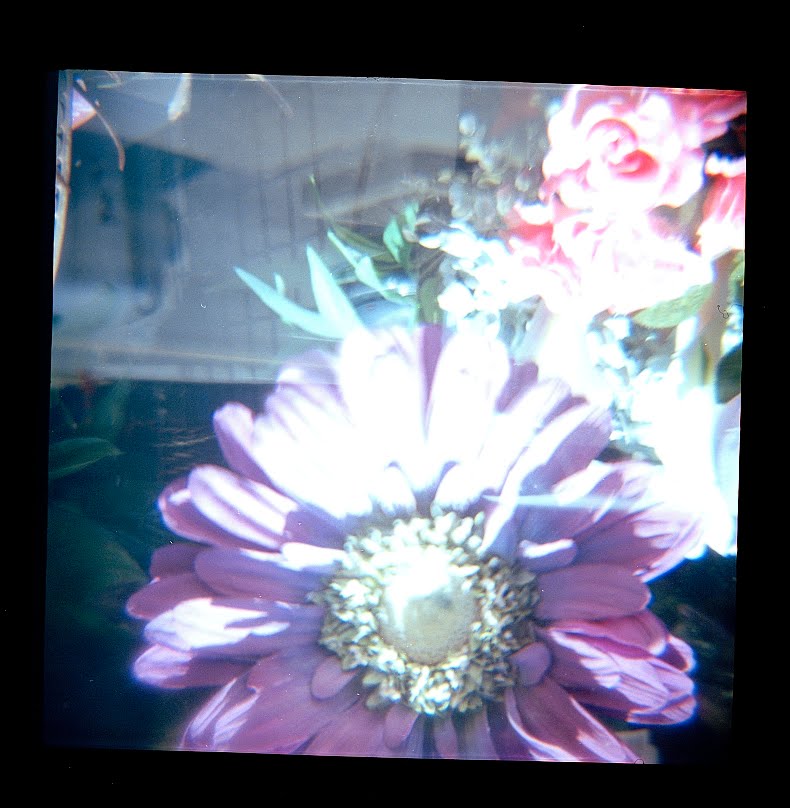
3. Correct the image by getting rid of dust and adjusting the color. Fix the thin white scratch across the bottom using any tools you like.


4. Eliminate the dust, fix the thin white scratch across the bottom and fix the border to make it more even.

5. Use one of the filters to quickly reduce dust.


Wednesday, April 20, 2011

image for healing tool


pen tool

http://www.picturesocial.com/video/how-to-use-the-pen-tool-in

Healing Tool

How to Use the Healing Tool to Restore Photos Using Photoshop CS2

Photoshop CS2 has many exciting features. Use the healing tool to restore photographs to their original state. The Healing Brush tool copies a texture from one area of the photograph to the flawed area, leaving the repaired area looking as natural as possible. After a bit of practice, you can correct flaws with just one click.

1
Open the image using Photoshop CS2 and select the Healing Brush tool. This option is ideal for fixing large areas such as a tear or smudge in the photograph.


2
Select the diameter and hardness for the brush by choosing the Brush Preset picker under Options. Use different sizes when retouching various places in a photo. Pick a large diameter for bigger fixes and a small diameter for small details.


3
Change the blend mode if necessary. For most restoration jobs, this should be set to Normal.


4
Choose a source. The source is the area that will be repeated to cover the flaw. There is a choice between Sampled and Patterned. Sampled uses a piece from the picture and is the one that you use most of the time.


5
Press "Alt," and click on the area to be copied. Select an area large enough to cover the flaw.


6
Drag this part of the picture to cover the flawed area of the picture. If it is not properly aligned, select the Align options in the Options bar.


7
Save the file and close it.


]

image for healing brush

image for practicing patch tool

patch tool in photoshop elements

how to create the patch tool if you don't have it in elements . . .

Open your image and make a duplicate layer. (CTR+J)
While on the duplicate layer, grab the Lasso tool and draw around the area you wish to patch. (blemish,dark circles under eyes,etc)
Click Select>Feather, and set it to a value to soften the edges. I use somewhere around 25.
Click Select>Transform, left-click and drag your selection to an area that you wish to patch from.
Click the green arrow after you are satisfied with your selection.
Hold down the CTRL key,left-click and drag the selection to where you want to patch. Release the mouse key and click Select>Deselect.
You can use the opacity control to adjust the result to your liking.
There are many CS features in Elements 9 now. This Patch Tool
work-around should work on older Elements versions. Give it a try and play with it.

patch tool

How to Use the Patch Tool in Photoshop CS2

Adobe Photoshop CS2 includes an impressive array of tools that allow users to quickly make edits that can greatly improve the quality of their photographs and graphic art. Users can easily erase and replace skin blemishes and surface scratches so well that the untrained eye will not be able to tell they were ever there. Photoshop's "Patch Tool" is one such tool, allowing you to use unblemished areas of an image as replacements for parts that are scratched or include unwanted elements.

Instructions

1
Open Photoshop CS2 and select "File" and "Open" from the application menu. Select an image with an area you want to touch up or patch and click "Open."


2
Select the "Tools Panel" and choose the "Patch Tool" nested beneath the Spot Healing Brush Tool. Check the "Source" bubble in the Tool Options Panel above your canvass.


3
Click and drag around the area you want to patch, making sure to connect back to your beginning point to complete the patch area.


4
Click and hold down your mouse inside the patch area. Drag this to an area that contains a clean section of background, or an image that you want to replace the current area of your patch selection. You will be able to see what the resulting patch looks like as you drag it around your image. Release your mouse when you find the right replacement area.


5
Select "File" and "Save As." Enter a new name and select a new folder for your patched image. Click "Save."


Wednesday, April 13, 2011

images


Pattern Stamp Tool

How to Use the Photoshop Pattern Stamp Tool

The Photoshop Pattern Stamp Tool is just like brushes on your Brushes palette. Instead of using the brushes, the Pattern Stamp Tool lets you select a "pattern" on your Pattern palette and then paint with it.

Patterns on the Pattern palette for the Pattern Stamp Tool can be custom made or installed as add-ons from external source.

This Photoshop tutorial will show you how to use the Pattern Stamp tool with preselect patterns on the Patterns palette.

Instructions

1
Start with either a new file (canvas) or load an image in your Photoshop.


2
 Stamp Tools on the tool box
Find on your tool box the "Stamps Tool". Click and don't release your left-mouse key on that, a menu will come up with two stamp choices.


3
 Pattern Stamp
Drag your cursor with the left-mouse key down and place it on top the second item in the "Stamps Tool" selection. That second item is the "Pattern Stamp".
Release left mouse key to activate.


4
Choose a brush on your Brushes palette. If your Brushes palette is not showing, go to Window > Show Brushes.


5
 Brush settings (center on Photoshop window)
Set your brush size and hardness or use it as is.
To set your brush size and hardness: right-click on your Brushes palette the brush you picked, choose Brush Options on the drop-down list. A dialog box will pop-up, adjust your settings to your liking there.
Click OK to complete process.


6
Right-click mouse to bring up a list of brush options, and see if you need any of those to change the property of your brush. Left-click to select an item, if needed.


7
 Find Pattern palette under Edit on the main menu
Choose a pattern from the Pattern pop-up palette in the options bar. Now you can paint with your Pattern Stamp after choosing a pattern for it. To access the Pattern palette: Edit > Preset Manager > Define Pattern.


8
 Pattern palette
Change the Pattern Stamp Tool property any time during your work. Just repeat Steps 4 to 6 to fit your situation.


9
 Painting with feather shape Pattern Stamps
The properties of your preset brush defines the final patterns presented by using your Pattern Stamp Tool.
Work example created with various Pattern Stamps using feather patterns instead of normal brushes in Photoshop.


Read more: How to Use the Photoshop Pattern Stamp Tool | eHow.com http://www.ehow.com/how_5083991_use-photoshop-pattern-stamp-tool.html#ixzz1JQ6VNLth

How to Create a Pattern Stamp

How to Create a Pattern Stamp

Pattern stamps in Photoshop are limited only by your imagination. Photoshop gives you the power to create unlimited pattern stamps and save those stamps as presets for future use. You can build your own private library of pattern stamps with only a few starter images.

Instructions

1
 Rectangle Marquee Tool
Open up any photograph in Photoshop CS3. Click on the Rectangle Marquee tool and use it to select the portion of your photograph that you want to use for your custom pattern stamp. Make sure to leave the "Feather:" setting at 0 px.


2
 Choose "Edit" from the toolbar
After selecting the portion of your photograph you want to use for your custom pattern stamp, click on the "Edit" then "Define Pattern" menu options at the top of your Photoshop workspace. Enter a name for your custom pattern in the box that pops open, and you now have a custom pattern stamp saved for future use in any of your projects.


3
You can create as many custom pattern stamps from one image as you want--just pick areas of the image that are different enough to make each of your stamps unique. For example, you may wish to make patterns from both light and dark areas of your photographs, as well as areas that contain lots of texture and colors versus those with a solid color.


Wednesday, April 6, 2011

layer mask lesson

(After right-clicking the image from the blog and saving it to your desktop)

1. Open Photoshop (From your Start Menu > Programs > Adobe CS2)

2. Open your image by going to the File menu and selecting Open.

3. Choose File and click Open

4. Make sure the Layers Palette is visible, if not go to Window > Layers

5. Copy your background using the keyboard shortcut CNTRL + J (Command J)

Levels

6. With the Background Copy Highlighted, Click on the Cookie and choose Levels.

7. Drag the midtones triangle to 0.75 and Click OK.

8. With the Levels Layer highlighted Click CNTRL + E (Command E) to merge down.

Masks

9. With the top layer selected click on the Add Layer Masks button.

10. You should see a white thumbnail for the Layer Mask. Use a black paintbrush to mask the parts of the layer that you want to remove.

Practicing Masks

Practicing Masks:

1. Create a new blank document in Photoshop by going to the File menu and selecting New. Set the dimensions (8 x 10 inches at 300 dpi).

2. Click on the make new layer button.

3. Fill the layer with a pattern by going to the Edit > Fill menu and selecting Pattern in the drop down menu under Contents.

4. Click on the make new layer button.

5. Fill the layer with a pattern by going to the Edit > Fill menu and selecting Color in the drop down menu under Contents.

6. With the top layer selected, click on the Add Layer Mask button.

7. A white layer mask thumbnail should be visible in the top layer. Using a black paintbrush, paint on the top layer to erase parts of the layer and reveal the layer underneath.

When you are finished, the areas that you have masked will be hidden from view. 


Layer Masks

Using Layer Masks

Photoshop CS2 allows you to mask selected areas of a layer. Masking gives you the ability to hide, edit, and protect, selected areas of an image. Further, masking allows you to blend, merge, and add fade attributes to multiple images within the same document. This document will define the two types of layer masks available in Photoshop CS2, it will detail the necessary steps to add a mask to a selected area of a layer, and it will explain how to hide and reveal portions of a layer within another layer.

Masks

In Photoshop CS2 there are two types of mask available, the layer mask and the vector mask. Both of these masks are grayscale images; meaning, you should cover a selected area in black that you would wish to hide and anything you would want to be partially visible you would paint using various shades of gray. The lighter the gray the more transparent the selected area is, white is fully visible. Once you hide part of an image using a mask, you can modify or fully restore it at any time since the mask is just covering up, and has not deleted, that part of the image. This is one of the distinct advantages of masking.

Layer Masks

Layer masks are the most common type of mask used. Layer masks are created by using the Painting Tools, primarily the Brush Tool. The layer masking method will cover a large area of an image quickly. While this method may save time, your masked area is more likely to be imprecise and have uneven edges that are not present with the vector masking method.

Vector Masks

Vector masks will give you a much cleaner and defined looking image than a layer mask will. Vector masks are created by using the Pen, Shape, or Path Selection Tool. While the edges of the mask are more precise, it takes a little more time and precision to create this mask than is necessary with a layer mask.

Creating a Mask

These steps will explain how to add a mask to your image in your Photoshop CS2 document. 
NOTE: Layer masks and vector masks can be applied to the same layer.

Instructions:

Open or create your image(s) in Photoshop CS2

Place the image(s) you wish to add masking properties to in their respective layers 
NOTE: Name each individual layer with a meaningful name. This will allow you to identify the contents of the layer quicker. For more information on naming layers see Renaming Layers.

Select the layer which you wish to apply a mask to

From the bottom of the Layers Palette, click ADD LAYER MASKA white thumbnail will appear in the Layers palette on your selected layer. This thumbnail will display the masking properties you add to this layer.

From the Toolbox, click the PAINT BRUSH TOOL, if you would like a layer mask 
OR 
Click the PEN, PATH SELECTION, or SHAPE TOOL, if you would like a vector mask.
NOTE: Layers masks consist of only white and black. Therefore, you can only apply the colors white and black to a layer mask with the tools referred to here. To hide areas of a layer you will want to apply black. If later you wish to reveal an area that you have masked, apply white.

Use your desired tool to designate the areas on the image you would like to hide or mask.


When you are finished, the areas that you have masked will be hidden from view. 


Hiding and Revealing Selections

You can use a layer mask to hide or reveal a selected area.

Hiding a Selection

Hiding a selection applies a mask over the selected area; the selection is not visible. The portion of the layer directly beneath the masked layer which corresponds to the selection is now visible. In the Layers palette, the layer which has a hidden selection will display a white thumbnail with the selected area in black. The example below shows a hidden selection along with the Layers palette.

Revealing a Selection

Revealing a selection applies a mask to the area surrounding the selected area; only the selection is visible. The portion of the layer directly beneath the masked layer which corresponds to the area outside of the selection is now visible. In the Layers palette, the layer which has a revealed selection will display a black thumbnail with the selected area in white. The example below shows a selection revealed along with the Layers palette.

To hide or reveal a selection:

Select the layer which you wish to apply a mask to 
NOTE: Any layers above the layer you have selected in the Layers palette will not be effected by the mask.

Using a selection tool, select the portion of the image you wish to hide or reveal


From the Layer menu select » Layer Mask » Hide Selection or Reveal Selection

http://www.uwec.edu/help/PhotoshopCS2/masking.htm


how to make masks in photoshop elements

http://graphicssoft.about.com/od/pselements/qt/layermasks.htm